
Ads are something that most of us dislike. They not only annoy us but also disrupt our experience of watching videos or browsing the web. Additionally, if your phone is infected with adware, it can negatively impact battery life and overall performance.
When it comes to blocking system-wide ads, many users may consider rooting their devices as an option. However, it is important to note that rooting is not a common practice among users. This is because rooting can introduce potential risks such as bricking the phone or compromising the device’s security.
Did you know that you can get rid of ads on your Android device without having to root it? Android has a feature called Private DNS or DNS over TLS, introduced by Google on Android Pie, that makes this possible.
If you’re not familiar with it, the Private DNS feature on Android makes it easy for users to change or connect to different DNS servers. With Android Pie, users can now set a specific DNS server for both WiFi and mobile networks in one place, rather than having to change it individually. This means that if you want to block ads on your Android device, all you need to do is switch to Adguard DNS.
What is Adguard DNS?
AdGuard DNS, as stated on their official site, offers a reliable solution for blocking internet ads without the need to install any applications. It is completely free and can be used on any device. The standout feature of AdGuard DNS is its ability to provide system-wide ad-blocking on Android devices, without requiring root access.
In this article, we will show you a simple and effective method to block ads on Android without the need for rooting your device or tinkering with Chrome flags. By utilizing Private DNS, you can easily disable ads and enjoy a seamless browsing experience on your Android device.
How to Block Ads on Android Using Private DNS
To ensure compatibility, make sure your phone is operating on Android 9 Pie or a more recent version. If your phone is running on Pie, you can easily follow the straightforward steps outlined below.
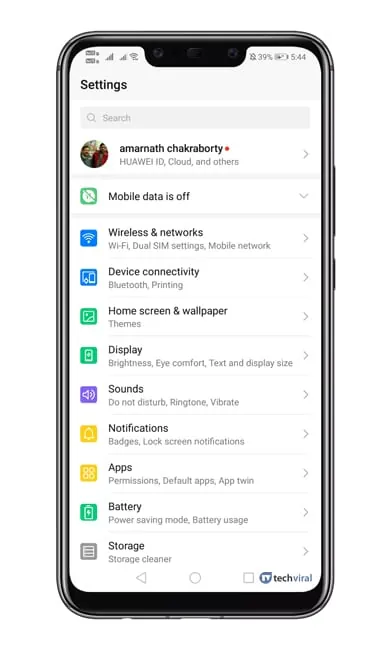
To begin, access the Android app drawer and select “Settings.”
To block ads using Private DNS on Android, follow these steps:
1. Go to the Settings tab and select Network & Internet or Wireless & Networks.
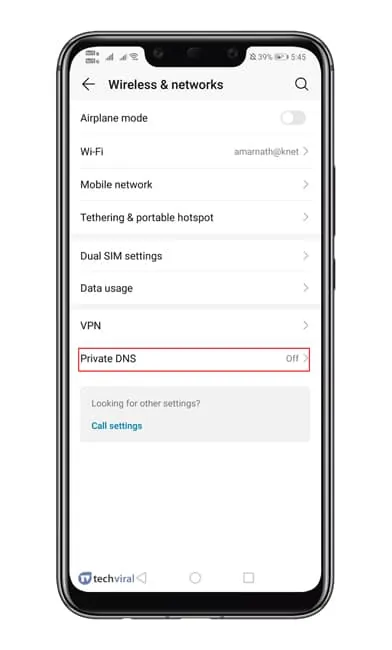
2. Under the Network & Internet or Wireless & Networks section, find the option for Private DNS.
3. Click on Private DNS and select the option to configure it manually.
4. Enter the Private DNS provider hostname you want to use. For example, you can use AdGuard DNS or any other DNS provider that supports ad blocking.
5. Save the settings and exit the menu.
By configuring the Private DNS on your Android device, you can effectively block ads and enhance your browsing experience.
To change your Private DNS settings, follow these steps:
1. Go to Network & Internet Settings.
2. Look for the option called Private DNS.
3. Select it.
To enable the ‘Private DNS’ option, follow these steps:
1. Go to your device’s settings and tap on the ‘Network & internet’ option.
2. Look for the ‘Private DNS’ or ‘DNS over TLS’ option and tap on it.
3. Select the ‘Private DNS provider hostname’ field.
4. Enter the DNS server address you want to use. This can be a custom DNS server or a specific provider’s hostname.
5. Tap on ‘Save’ or ‘OK’ to apply the changes.
By enabling the ‘Private DNS’ option, you can have more control over your device’s DNS resolution and potentially enhance your online privacy and security.
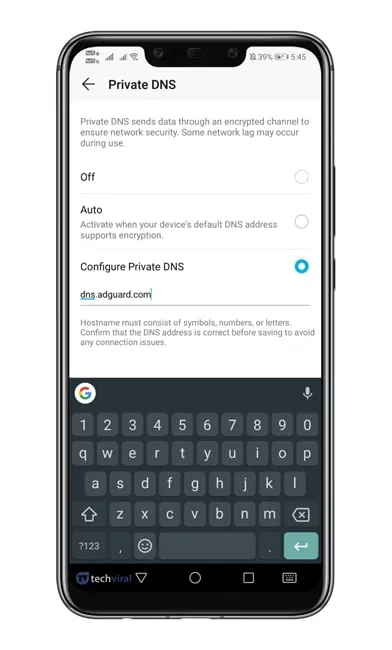
4. To proceed, choose the option “Configure Private DNS.”
Enter the hostname and type in “dns.adguard.com” under the given field.
Please make sure to type in the hostname in the provided space.
If you are unable to see the image, please enable JavaScript or click on the link [here](https://ninjafantasy.io/wp-content/uploads/2024/01/ADGUARD-DNS-3.jpg).

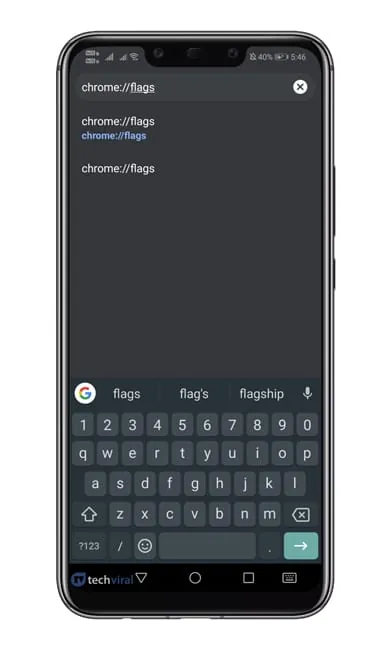
Once you have made the necessary changes, save the settings and proceed to open the Google Chrome browser.
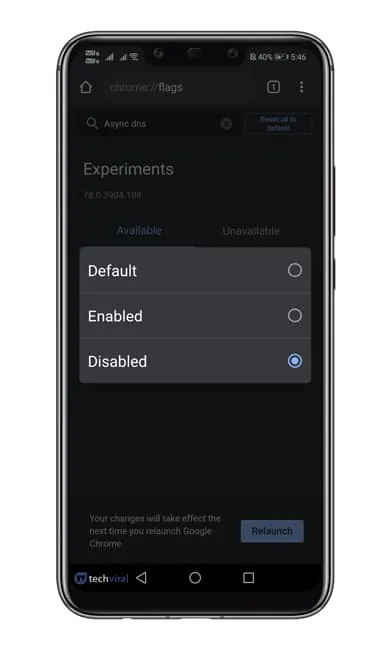
To access the flags settings in Chrome, simply enter “Chrome://flags” in the URL bar and press Enter.
To access the Chrome flags, you can follow these steps:
1. Open Google Chrome on your computer.
2. In the address bar, type “chrome://flags” and press Enter.
3. This will take you to the Chrome flags page where you can enable or disable experimental features and settings.
4. Please note that these features are not stable and may cause issues or instability in your browser.
5. Proceed with caution and only enable features that you understand and are willing to experiment with.
6. Once you have made your desired changes, you may be prompted to restart your browser for the changes to take effect.
Please keep in mind that accessing and modifying Chrome flags can have unintended consequences, so it is recommended to proceed with caution and only make changes if you are familiar with the potential risks.
To disable the Async DNS option, simply search for ‘DNS’ and toggle it off.
To disable the “Async DNS” option, follow these steps:
1. Open the settings menu on your device.
2. Look for the “Network” or “Internet” section and tap on it.
3. Find the “Advanced” or “Additional settings” option and select it.
4. Locate the “Async DNS” option and toggle it off.
5. Save your changes and exit the settings menu.
By disabling the “Async DNS” option, you can improve your device’s performance and potentially resolve any DNS-related issues you may be experiencing.
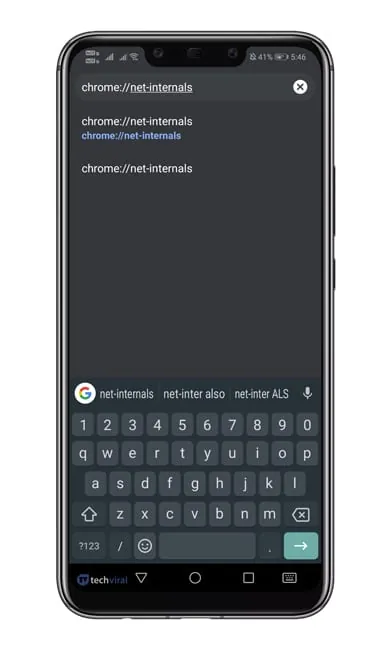
To access the Chrome Net Internals page, simply enter “chrome://net-internals” in the URL bar and press enter.
To access the “chrome://net-internals” page, follow these steps:
1. Open Google Chrome.
2. In the address bar, type “chrome://net-internals” (without quotes) and press Enter.
3. The “chrome://net-internals” page will open, allowing you to access various network-related information and settings.
Note: If you are unable to access the page using the above method, you can also try copying and pasting the URL directly into the address bar.
To clear the cache, go to the DNS tab and select the “Clear Cache” option.
To clear the cache on your device, follow these steps:
1. Tap on the ‘Clear Cache’ option.
2. This will remove any stored data and temporary files from your device, helping to improve its performance.
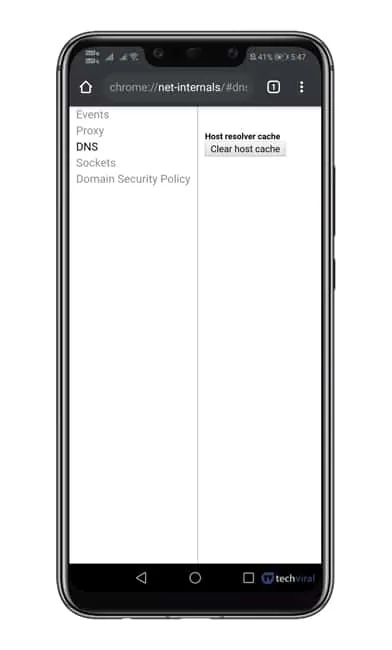
Congratulations! You have successfully completed the process. To apply the changes, simply restart your Chrome browser.
Block Ads on Android Using DNS Switch
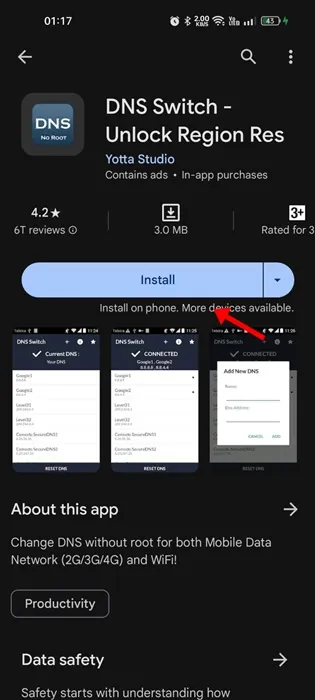
The DNS Switch app, available for Android devices, offers a convenient way to block ads across your entire system. With this app, you can quickly and easily switch DNS addresses on your Android device.
To block ads on Android, simply download the DNS Switch app and activate the AdGuard DNS with just a tap. DNS Switch offers a range of public DNS servers that make ad blocking a breeze.
To get started, you’ll need to download and install the DNS Switch app on your Android smartphone.
dummy
 dummy
dummy
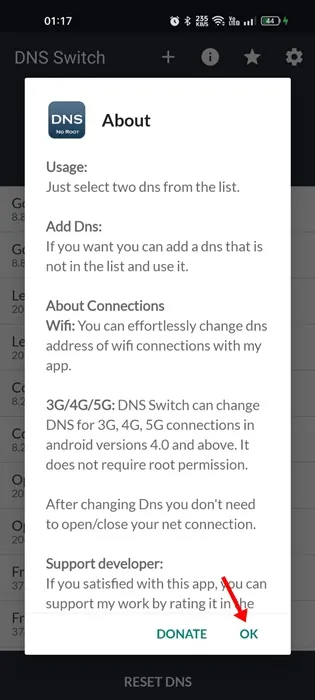
2. Open the app once it has been installed and tap “OK.”
dummy
 dummy
dummy
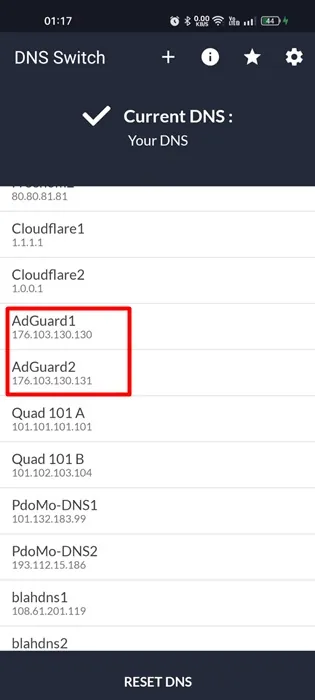
3. In the DNS presets, locate the options labeled “AdGuard1” and “AdGuard2”.
dummy
 dummy
dummy
“`
dummy
dummy
4. After selecting both options, a prompt will appear asking for permission to create a VPN using the DNS Switch app. Simply tap on “Allow.”
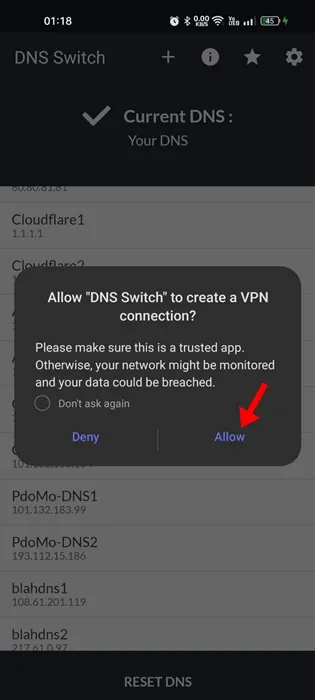
Once you have completed these steps, the app will initiate a VPN connection and enable the AdGuard DNS on your Android device. As a result, you will notice a significant reduction in the number of ads you encounter while browsing the internet or engaging with various applications and games.
Best DNS for ad blocking Android
If you’re looking for alternative DNS providers for privacy and ad blocking on your Android device, there are numerous options available. Here are some of the top DNS providers recommended for blocking ads on Android smartphones.
1. LibreDNS
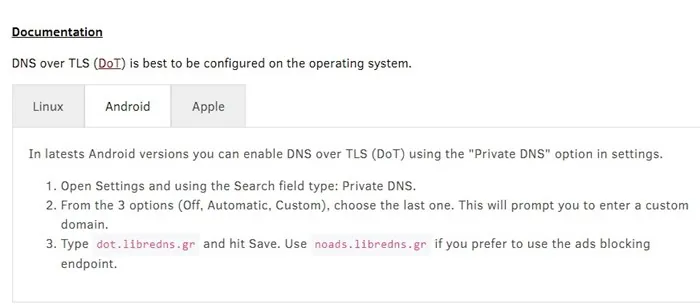
If you’re looking for enhanced security while browsing the app, LibreDNS is a fantastic public DNS provider that you should consider. It blocks ads and bypasses certain restrictions, making it an excellent choice for those who value privacy and protection.
To block ads on your Android device using LibreDNS, the setup process is quite straightforward. Just follow the steps we’ve outlined above and enter “noads.libredns.gr” in the “Configure Private DNS” field.
2. Control D
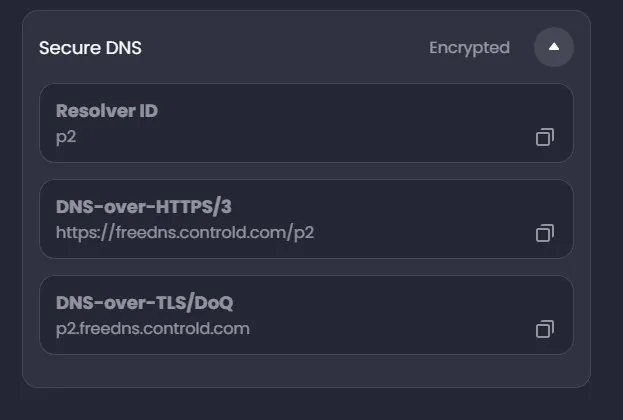
Control D is a reputable public DNS provider that takes pride in its ability to prevent ads, malware, and trackers from infiltrating your smartphone or computer.
It offers specialized DNS servers to block ads and trackers, unblock social media, filter content, and more. To block ads, you can add p2.freedns.controld.com to your Private DNS configuration.
3. NextDNS
dummy
 dummy
dummy
NextDNS boasts of providing comprehensive protection for your device against various security threats encountered on the web. With its advanced capabilities, it effectively blocks malicious websites, intrusive ads, and trackers, while also offering content filtering and more.
NextDNS’s private DNS has the impressive capability of blocking not only malware and phishing attacks, but also cryptojacking and other threats. To access its DNS server address, you will need to create an account and configure your settings.
After completing the previous steps, it is necessary to download the NextDNS app and proceed with its setup in order to activate the DNS server.
If you want to get rid of ads on your Android smartphone, here are some of the top DNS options for ad blocking. These DNS servers will effectively eliminate ads from web pages, apps, and games on your Android device. Give them a try and enjoy an ad-free browsing experience.
Other Ways to Block Ads on Android?
In addition to configuring Private DNS to block ads on Android, you also have the option of using a web browser that has built-in ad blocking capabilities.
Nowadays, many Android browsers, including Opera, Microsoft Edge, Brave Browser, and Firefox Focus, come equipped with an ad blocker feature. This feature is designed to automatically detect and block ads while browsing webpages.
If you’re looking for the best adblock browsers for Android, we’ve got you covered. We’ve already compiled a list of top-notch options that will cater to your specific requirements. Take a look at our comprehensive guide and find the perfect web browser for you.
Adguard DNS does a great job at blocking the most annoying ads, although it may not block all of them. The method I’ve shared above is effective in removing ads from every webpage. I genuinely hope this article has been helpful to you! Feel free to share it with your friends as well. If you have any doubts or questions, please don’t hesitate to let us know in the comment box below.