
If you use Facebook regularly, chances are you’ve shared numerous posts in the form of text, photos, and videos on your profile. It’s also likely that you’ve accidentally deleted a few posts and later regretted it. If this is a common occurrence for you, this article might help alleviate some of the stress.
Facebook and Instagram, both owned by the same company, provide users with the option to recover deleted posts. Previously, we provided a comprehensive guide on recovering deleted photos and videos on Instagram. Now, we will delve into the process of recovering deleted posts on Facebook.
Can You Recover Deleted Profile Posts on Facebook?
Recovering deleted Facebook profile posts is possible in a few simple steps. However, there are a couple of important things to consider before you proceed with the recovery process.
Unfortunately, Facebook does not provide an option to recover posts that have been deleted more than 30 days ago. Once a post has been deleted for over 30 days, it is permanently removed and cannot be retrieved.
If you delete a post, you have a 30-day window to recover it. Once this time period elapses, the posts are permanently deleted and cannot be restored.
How to Recover Deleted Facebook Posts
If you have unintentionally deleted some posts from your Facebook profile and want to restore them, you can do so by accessing the Recycle Bin feature on Facebook. In this guide, we will walk you through the steps to access the recycle bin and recover your deleted posts. Let’s begin.
To begin, launch your preferred web browser and navigate to Facebook.com. Then, proceed to log in to your Facebook account.
To access additional options, navigate to the homepage and click on the downward arrow or your profile picture located in the top-right corner.
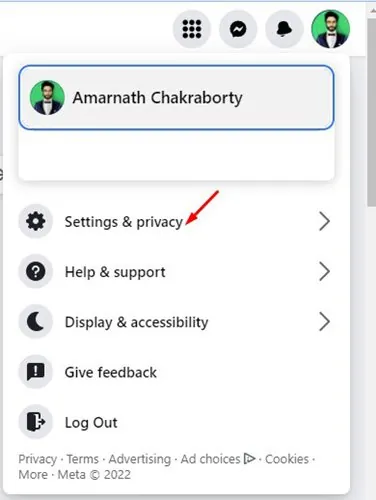
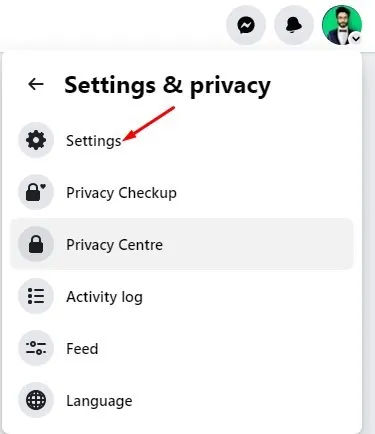
To access the desired options, navigate to the drop-down menu and select “Settings & Privacy”.
The image above showcases the “Settings & Privacy” section.
4. Click on the “Settings” option under “Settings & Privacy,” as indicated in the screenshot provided.
The paragraph you provided seems to be a code snippet and not a text-based paragraph. It looks like it is related to settings and images, but without further context or information, I cannot provide a meaningful and human-like rewrite. Please provide a text-based paragraph for me to work with.
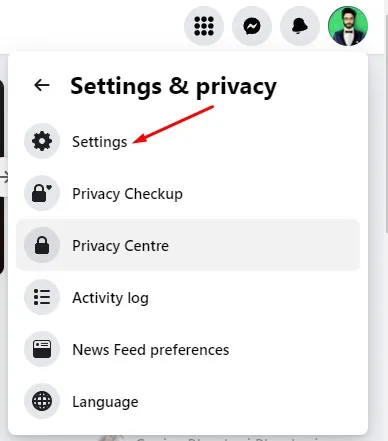
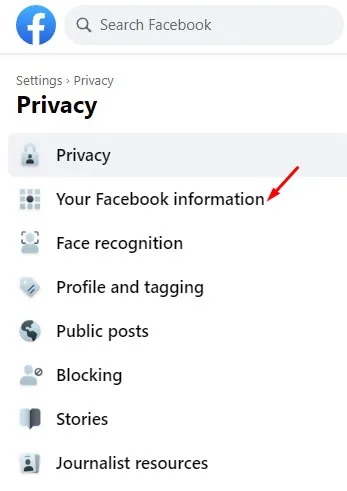
To proceed, simply select the “Privacy” option, as demonstrated below.
Privacy is a crucial aspect of our online lives. It is important to protect our personal information and ensure that it remains secure. With the increasing use of social media platforms like Facebook, it is essential to be aware of the privacy settings and features available to users. By understanding and utilizing these settings effectively, we can have more control over our privacy and safeguard our personal data from unauthorized access.

To access the relevant settings, navigate to the Settings page and locate the section labeled “Your Facebook information.”
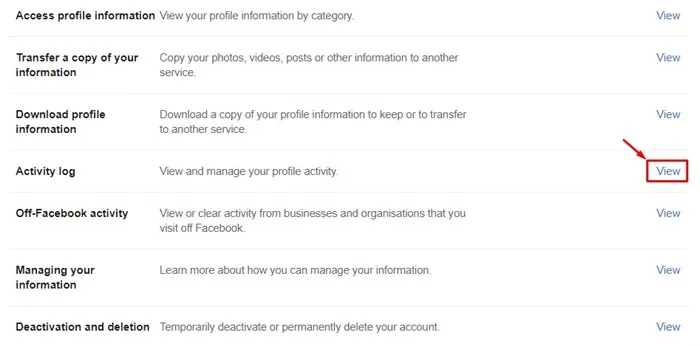
To access the Activity log, simply click on the View button located beside it in the right pane.
To view the Activity log, simply click on the View button next to it.
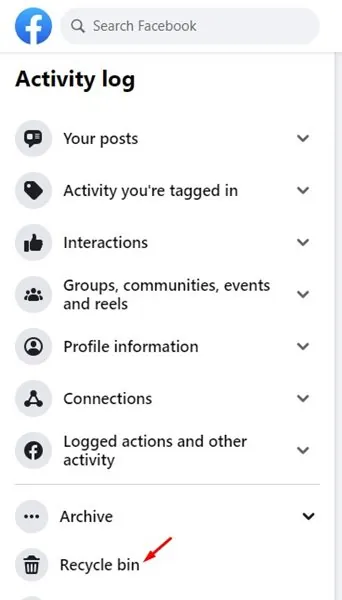
Now, you can scroll down and find the Recycle Bin on the left pane. Just click on it.
dummy text
 dummy text
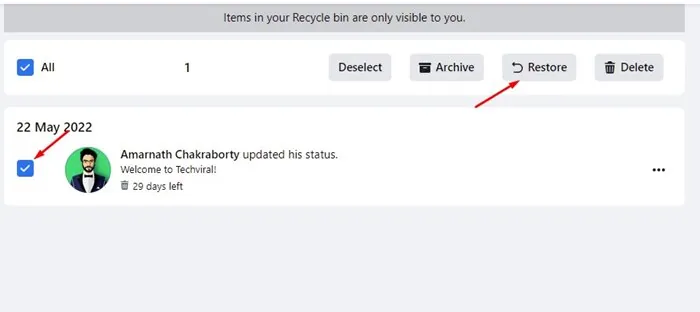
You can now retrieve any posts that you have deleted within 30 days.
To restore a post, simply follow these steps:
1. Choose the post that you wish to restore.
2. Click on the “Restore” button.
To restore a deleted Facebook post, simply click on the Restore button. If you don’t see the post, you can also try using the noscript option by clicking on the provided link. This will bring up a page where you can select the specific post you want to recover.
Here’s how you can recover all your deleted posts on Facebook. Keep in mind that you can only restore posts deleted within 30 days. Unfortunately, there is no option to recover files deleted before the 30-day mark on Facebook.
Recover Deleted Facebook Posts on Mobile
If you are using the Facebook mobile app, you need to follow these steps to recover a deleted Facebook post. The process is the same for both the iOS and Android versions of the Facebook app.
To begin, simply launch the Facebook app on your mobile device and navigate to your profile page.
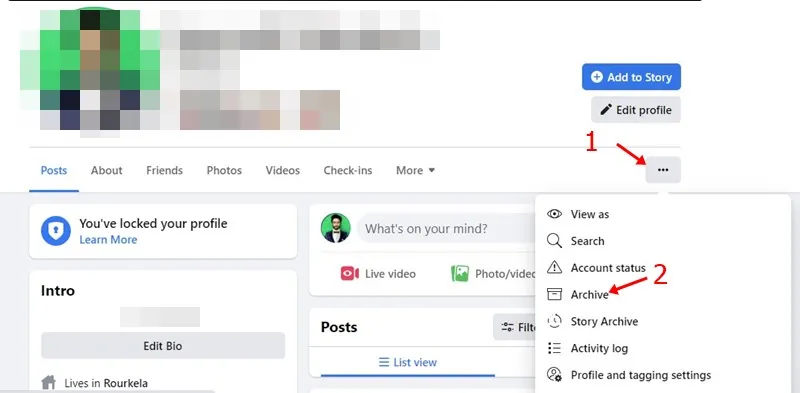
To access further options, simply tap on the three dots located beside the Edit Profile button.
 dummydummy
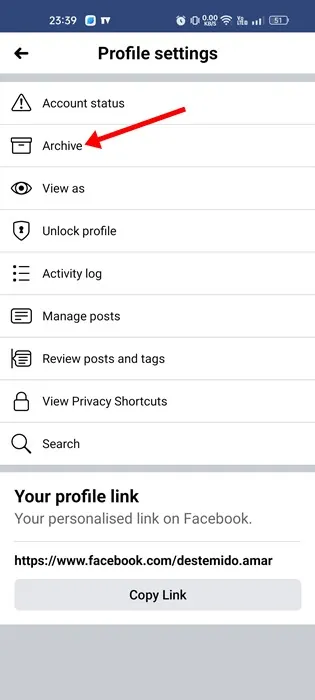
To access the Archive feature, navigate to the Profile Settings page and tap on the Archive button.
dummy image
 dummy image
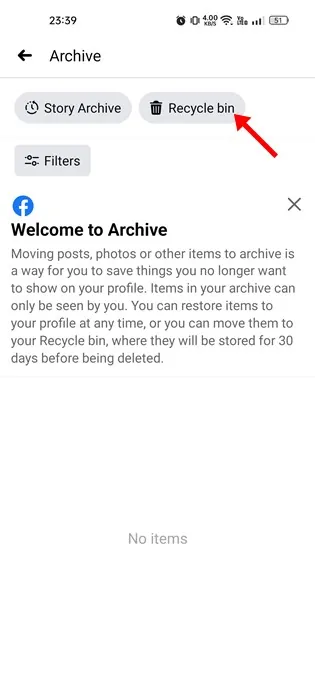
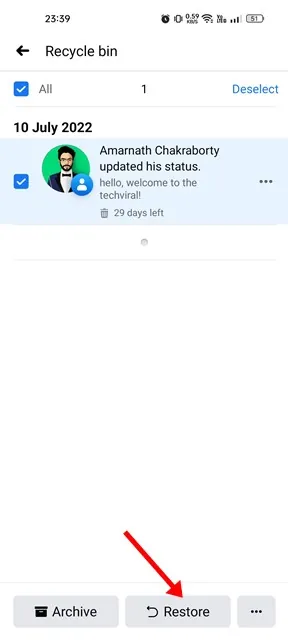
To access the Recycle Bin or Trash option, simply tap on it located on the Archive page.
dummy
 dummy
dummy
To find all deleted Facebook posts, simply select the post you want to recover and tap on the Restore button.
dummy
 dummy
dummy
6. Tap the “Restore” button again on the confirmation prompt to restore the profile.

To restore the post to your profile, simply follow these steps. We will use the Android version of Facebook as an example, but iOS users can also apply the same process.
Archiving a Facebook Post
On Facebook, you have the option to archive your posts instead of deleting them. Archiving a post is different from deleting it. When you delete a Facebook post, it is moved to the trash folder and remains there for 30 days. After the 30-day period, the post is permanently removed from your account.
When it comes to archiving a Facebook post, there are a few simple steps you can follow. First, locate the post that you want to archive. This can be done by scrolling through your timeline or using the search bar at the top of the Facebook page. Once you’ve found the post, click on the three dots in the top right corner of the post. A dropdown menu will appear with several options. Select the “Archive” option from the menu. This will move the post to your archived posts folder, which can be accessed by clicking on the three lines in the bottom right corner of the Facebook app or by going to your profile and selecting the “Archived” tab. From the archived posts folder, you can choose to unarchive the post at any time by following the same steps and selecting the “Unarchive” option. Archiving a post is a great way to declutter your timeline without permanently deleting the post. It allows you to keep a record of the post without it being visible to your friends or followers. So, if you’re looking to tidy up your Facebook profile, consider archiving your posts instead of deleting them.
When you want to hide a post on Facebook, you have the option to archive it. By archiving a post, it is moved to the Archive folder in your account. The archived post can be restored at any time.
If you’re not entirely sure about deleting a post, archiving it might be the best choice.
Recover Deleted Facebook Posts from the Accounts Centre
To download all your profile information from the Accounts centre, follow the simple steps we have shared below.
To begin, access your Facebook account using a desktop web browser. Once logged in, locate your profile picture at the top right corner of the screen and click on it. From the drop-down menu, select the option labeled “Settings”.
The image titled “Settings” has been displayed here. Please note that if you are unable to view the image, you can click on the following link to download a copy of your information: [link].
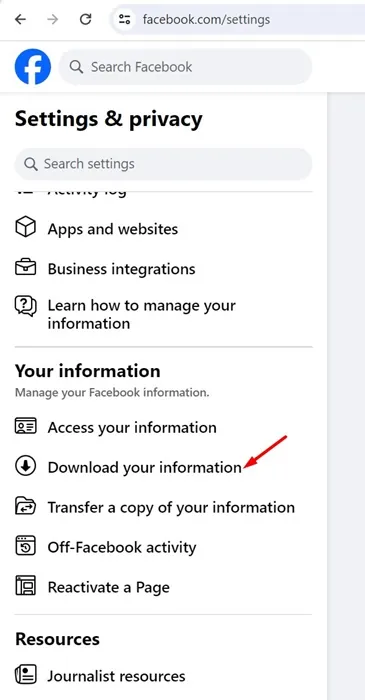
To access the feature, go to Settings & Privacy. From there, choose Download your Information under the Your Information section.
dummy
dummy
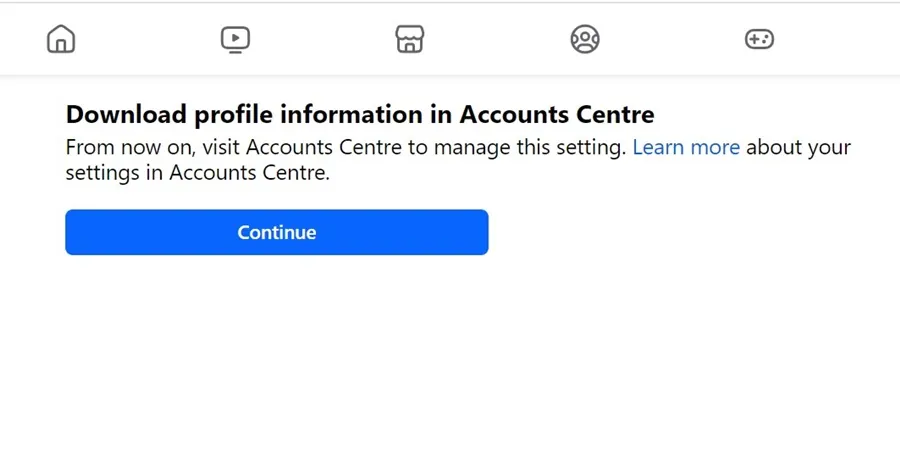
Click on the “Continue” button located on the right side.
dummy
 dummy
dummy
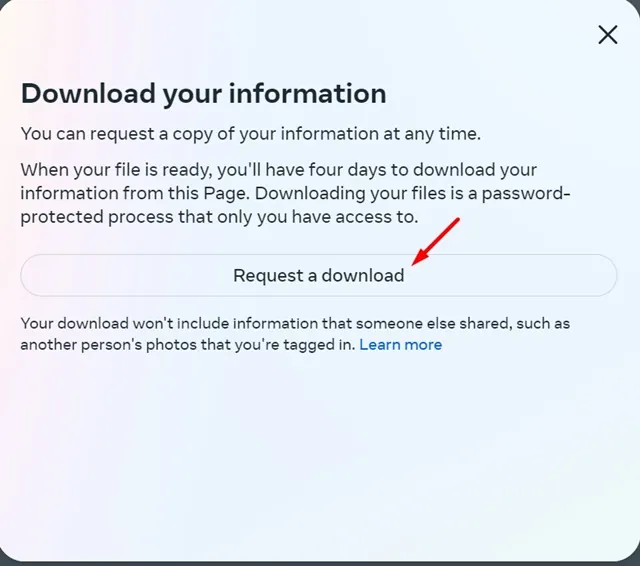
To download your information, simply click on the “Request a download” button on the prompt.
Request a download of your information
You can request a download of your information from the website. Simply follow these steps:
1. Go to the website and log in to your account.
2. Navigate to the settings or account section.
3. Look for the option to download your information.
4. Click on the download button and follow any prompts or instructions.
5. Wait for the website to prepare your download.
6. Once ready, you will receive a notification or an email with a link to download your information.
7. Click on the link and follow any further instructions to complete the download.
Remember to keep your downloaded information secure and protected.
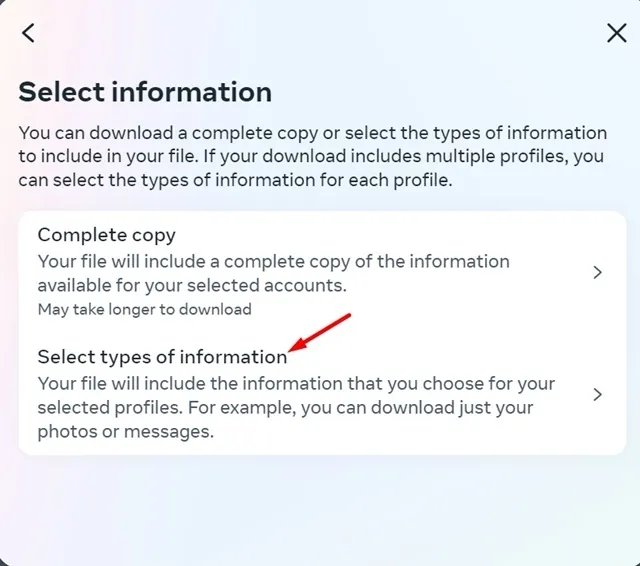
5. To proceed, choose your account. When prompted to select information, simply click on the option labeled “Select types of information.”
When it comes to selecting types of information, there are a few key factors to consider. First and foremost, you should determine the purpose of the information you are seeking. Are you looking for general knowledge or specific details? Once you have a clear understanding of your objective, you can then decide on the most appropriate type of information to select.
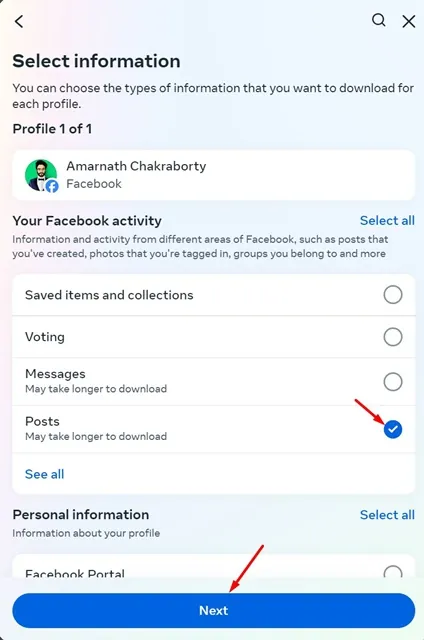
To proceed, choose the “Posts” option under the Your Facebook Activity section, and then click on “Next.”
dummy
 dummy
dummy
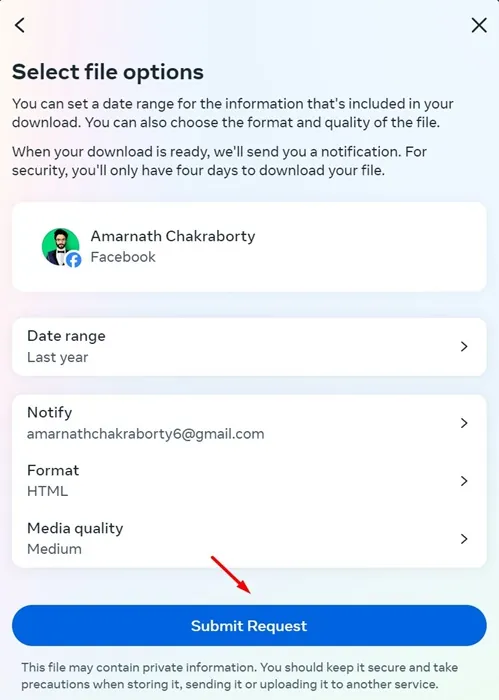
To select the date range, format, and media quality, follow these steps:
1. Click on the date range option.
2. Choose the desired format from the available options.
3. Select the preferred media quality.
4. Finally, click the “Submit Request” button to proceed.
dummy
 dummy
dummy
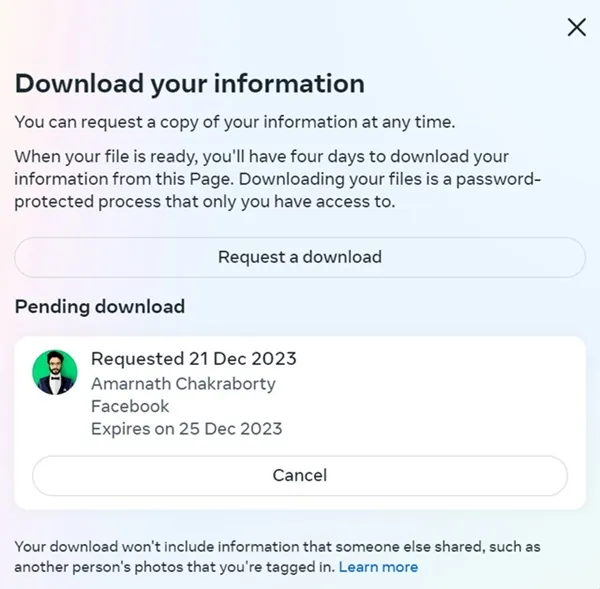
After completing the steps, you will need to wait for a few days. During this time, Facebook will send your Account information to the email address associated with your account. Additionally, you will receive a notification on your Facebook account once the file is available for download.
dummy
 dummy
dummy
To download the file, all you need to do is click on the URL provided in the email or the notification on your Facebook account. Once the file is downloaded, simply open it up and review your posts.
Once the process is complete, you will receive an email containing a file that includes all the posts you have shared on your Facebook account.
How to recover deleted Facebook posts after 30 days?
After 30 days, your Facebook posts will be permanently deleted from your account, and there is no way to recover them.
If you have archived the Facebook post, retrieving it is a breeze, even if it has been 30 days since the post was made. Unlike the Recycle bin, which permanently deletes items, the Archive feature moves your posts, photos, or other items to a designated folder.
Can’t Find Post in the Trash Folder?
When you delete a post, it doesn’t always go to the Trash or Recycle Bin folder. Let’s say you uploaded eight photos on your profile and decided to delete the third one. In this case, the third photo will vanish instantly without being sent to the Recycle Bin or Trash folder.
If you’re unable to locate your post in the Trash folder, it’s likely that it has been permanently deleted or was deleted more than 30 days ago.
Other Ways to Find Deleted Facebook Posts
If you’re unable to locate a post that you wish to recover, there are several strategies you can employ to help you find the desired post. Here are a few options to consider.
Try to find the original post
If you’ve ever shared a specific post and then deleted it, try recalling that post and see if you can find the original one you shared.
To locate the original post, utilize Facebook’s search feature and apply filters. Alternatively, you can employ Google search and utilize keywords from the post to track it down.
Check your friends’ emails
If any of your Facebook friends have email notifications enabled, you can request them to check their email. It’s possible that you have mentioned or tagged them in the post, and they may have already received an email notification.
You can simply ask your friends to check their email inbox for the post you are searching for.
Check your email inbox
If you have enabled Facebook push notifications, you might find a copy of the post you’re searching for in your email inbox. Simply open your email inbox and search for the keyword ‘Facebook’.
Check your email service to see if you can find any emails you received from Facebook. Look for any emails that may contain the deleted post.
If you ever find yourself in a situation where you need to recover deleted Facebook posts, don’t worry! I’ve got you covered with some easy steps to help you out. To ensure the safety of your posts and have a backup, you can download a copy of all your Facebook data. If you require assistance in retrieving deleted Facebook posts, feel free to let us know in the comment section below.