
If you are a Windows user, you might be aware that the operating system runs numerous processes in the background. These processes typically operate silently without requiring your explicit permission.
At times, your computer may experience issues resulting from the malfunctioning of devices or software involved in the process. The tasks running in the background can consume a significant amount of your computer’s RAM resources, occupy disk space, and deplete your battery life.
Windows users have been experiencing various issues related to the Killer Network Service (KNS) recently. Some users have reported that the Killer Network Service causes high Disk usage, while others have noticed that it runs in the background and consumes a significant amount of memory.
What is Killer Network Service?
Just like any other Microsoft service, the Killer Network Service (KNS) operates in the background without any user interference. Specifically designed for Intel series WiFi cards, its primary objective is to enhance the gaming experience.
If you notice the presence of the Killer Network Service in your Task Manager, it is likely that your laptop or PC is equipped with an Intel Killer Wireless Series card. These WiFi cards from Intel Killer are specifically designed to enhance gaming performance and are highly recommended for gamers.
Killer Network Service is commonly found on gaming laptops, offering reduced latency for optimal gaming experiences over a WiFi network.
Is Killer Network Service a virus?
No, Killer Network Service is not a virus or malware. It is simply a background process that is completely legitimate and safe to run. If any antivirus software is flagging it as malware or a virus, it is a false positive warning.
If you are not using an Intel Killer Gaming Grade Wifi card, the Killer Network Service may still appear in the task manager, which could indicate the presence of a virus or malware.
If you suspect that a process on your Windows system may be malware, it’s important to cross-check the process to ensure its legitimacy. Malware has been known to disguise itself as a Windows Service, making it appear genuine. However, it’s crucial to be cautious and verify the authenticity of any suspicious processes.
If your PC’s resources are being used for an extended period by Killer Network Service on Windows, it could be a sign of a virus or malware. Typically, this process is located at C:\Program Files\KillerNetworking\KillerControlCenter. Therefore, if you find that the program is not in the specified path, it is important to uninstall it promptly.
Best Ways to Fix Killer Network Service High CPU Usage?
There are actually several solutions to resolve the issue of high CPU usage caused by Killer Network Service. You have the option to either disable the service entirely or uninstall it from your system. Let’s explore some of the most effective methods to address the problem of Killer Network Service consuming excessive CPU resources.
1) Stop Killer Network Service via Windows Services
To fix the issue of high disk or CPU usage, you can utilize the Windows Services app to stop the Killer Network Service. By stopping the service, you will see an immediate improvement. Follow these steps to do so:
1. Open the Windows Services app.
2. Look for the Killer Network Service in the list of services.
3. Right-click on the service and select “Stop” from the context menu.
4. Wait for a few seconds to ensure that the service has been successfully stopped.
5. Close the Services app and check if the high disk or CPU usage has been resolved.
By following these steps, you can effectively address the issue and optimize the performance of your system.
dummy
 dummy
dummy
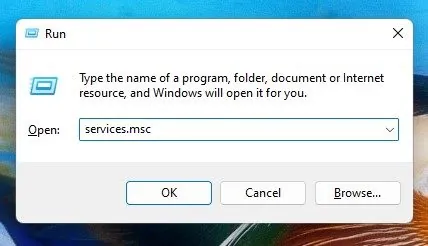
- First, press the Windows Key + R button on your keyboard.
- This will open the RUN dialog box. Type in services.msc and hit Enter.
- On the Windows Services, find the Killer Network Service.
- Double Click on the Killer Network Service. On the Service Status, select Stop.
- Once done, click the Apply button and close the Windows Services app.
To complete the process, simply follow these steps: once you have made the necessary modifications, proceed to restart your Windows computer. By doing so, you will effectively halt the operation of the Killer Network Service on your device.
2) Switch to High-Performance Plan
Choosing the right power plan for your Windows PC can have a significant impact on its performance.
If Killer Network Services is causing your Windows to slow down, you can attempt switching to the High-Performance Plan. This power plan adjusts various settings to enhance your device’s performance, although it may consume more battery life. Follow these steps to switch to a high-performance plan.
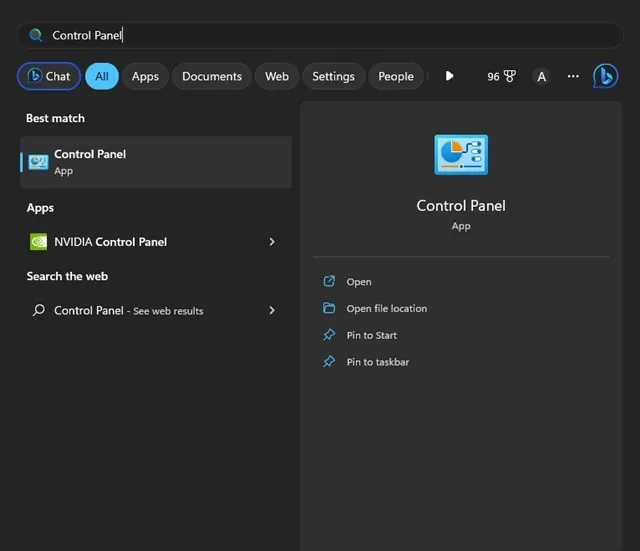
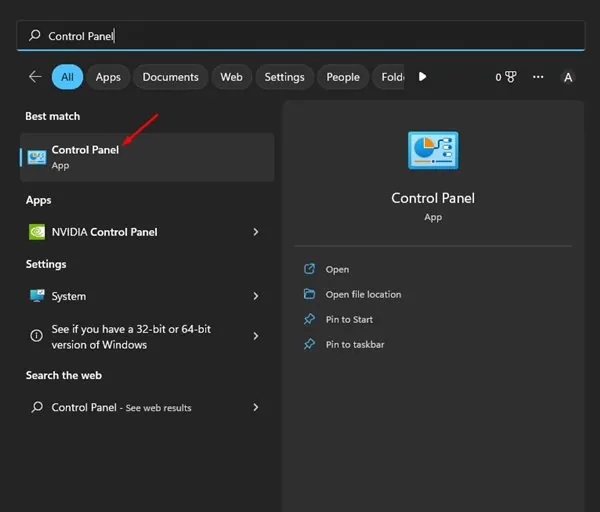
To begin, simply click on the Windows search bar and type in ‘Control Panel’. Then, select the Control Panel app from the list of options.
The control panel is an integral part of any system, allowing users to manage and control various aspects. It provides a user-friendly interface that simplifies the process of configuring and controlling the system. With a control panel, users can easily access and modify settings, manage resources, monitor performance, and perform various administrative tasks. It serves as a centralized hub that enables efficient management and control over the system’s functionalities.
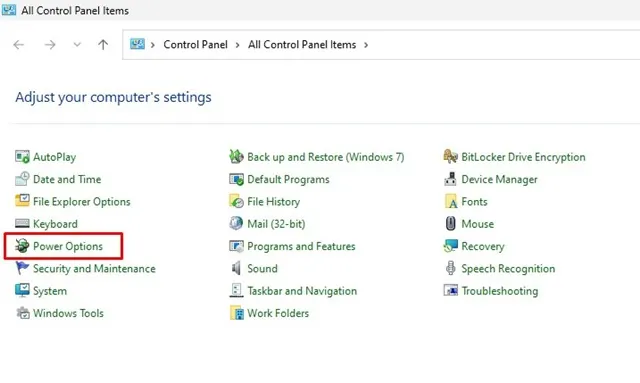
To access the Power Options in the Control Panel, simply follow these steps:
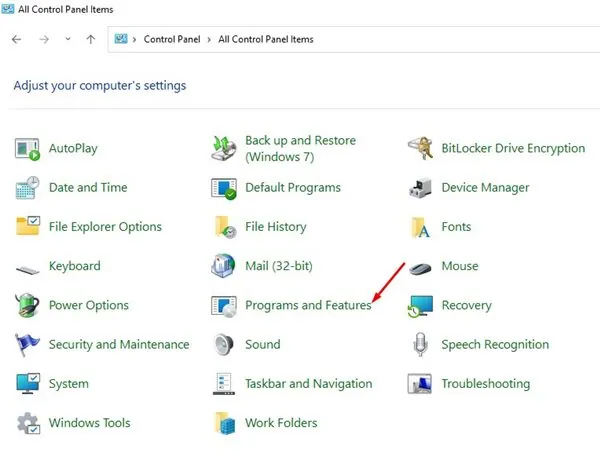
1. Open the Control Panel on your device.
2. Once the Control Panel is open, locate and click on the Power Options.
That’s it! Now you can easily access the Power Options in the Control Panel.
Power Options are an important feature in modern computing devices. They allow users to customize how their device uses power, optimizing it for performance or energy efficiency. By adjusting power options, users can control the behavior of their device’s hardware components and conserve battery life when needed. Power options typically include settings such as power plans, sleep options, and display brightness. Users can choose from predefined power plans or create custom plans based on their specific needs. This level of customization ensures that users can tailor their device’s power usage to their preferences and requirements.
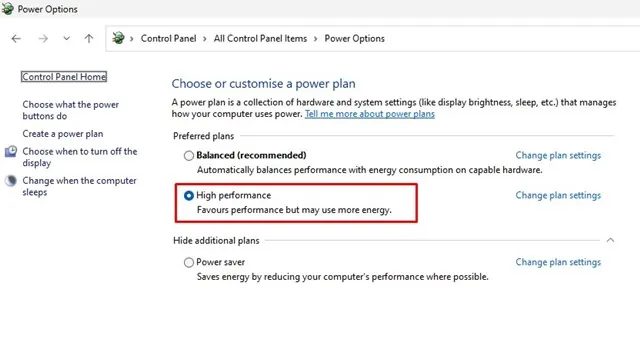
To optimize your computer’s performance, follow these steps:
3. Go to the Power Options and choose the ‘High Performance’ setting.
dummy
 dummy
dummy
To fix the issue of high CPU usage caused by Killer Network Service, simply follow these steps. Once you have made the necessary changes, all you need to do is restart your Windows computer and check if the problem has been resolved.
3) Uninstall Killer Network Service Using Control Panel
To uninstall the Killer Network Service on Windows 10/11, follow these simple steps:
1. Open the Control Panel on your computer.
2. Look for the “Programs” or “Programs and Features” option and click on it.
3. In the list of installed programs, locate the Killer Network Service.
4. Right-click on it and select “Uninstall” from the drop-down menu.
5. Follow the on-screen prompts to complete the uninstallation process.
By following these steps, you will be able to uninstall the Killer Network Service from your Windows 10/11 system.
To start, simply access Windows Search and type “Control Panel”. Then, proceed to open the Control Panel app from the search results.
The Control Panel is a useful feature that allows you to manage and customize various settings on your device. It provides a user-friendly interface where you can easily access and modify system preferences. With just a few clicks, you can uninstall programs, change display settings, update drivers, and much more. It’s a powerful tool that gives you control over your device’s functionality.
2. Open the Control Panel and click on “Programs and Features”.
dummy
 dummy
dummy
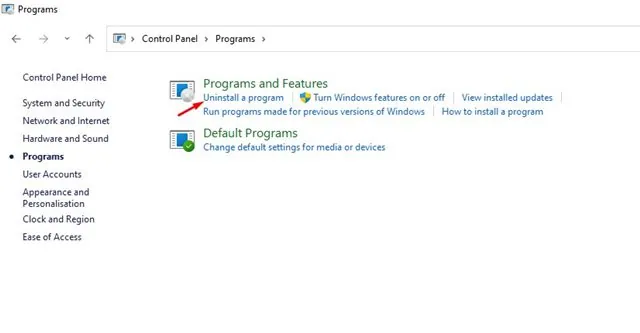
3. Click on “Uninstall a program” under Programs and Features.
To uninstall a program, you can follow these steps:
1. Open the Control Panel:
– Click on the Start button in the bottom left corner of your screen.
– Type “Control Panel” in the search bar and click on the Control Panel app.
2. Navigate to the Programs and Features section:
– In the Control Panel, click on the “Programs” category.
– Click on the “Uninstall a program” link under the “Programs and Features” section.
3. Find the program you want to uninstall:
– Scroll through the list of installed programs and find the one you want to remove.
– You can also use the search bar at the top right corner to search for a specific program.
4. Uninstall the program:
– Select the program you want to uninstall by clicking on it.
– Click on the “Uninstall” button at the top of the program list.
– Follow the prompts and instructions provided by the uninstaller to complete the removal process.
5. Restart your computer (optional):
– After the uninstallation is complete, it is recommended to restart your computer to ensure all changes are applied.
That’s it! The program should now be successfully uninstalled from your computer.
To uninstall the Killer Network Manager Suite, follow these steps:
1. Locate the Killer Network Manager Suite on your computer.
2. Right-click on it.
3. From the options that appear, select “Uninstall.”
By following these steps, you will be able to uninstall the Killer Network Manager Suite from your computer.
To ensure a complete uninstallation process, it is crucial that you also remove the Killer Wireless Drivers from the Control Panel.
After uninstalling both programs, the Killer Network Service will no longer appear on your Windows Task Manager. This is the process to uninstall the Killer Network Service from your Windows 10/11 computer.
4) Stop Killer Network Service via Resource Monitor
Resource Monitor serves as an upgraded alternative to Task Manager on your Windows operating system. You can also use it to halt the Killer Network Service. Here’s how you can do it:
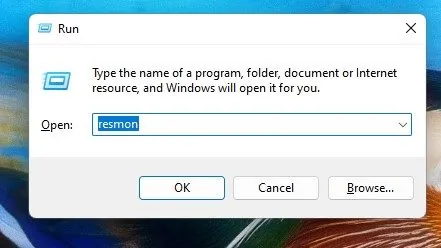
To open the RUN dialog box, simply press the Windows Key + R button.
To open the RUN dialog box, simply type “resmon” and press the Enter button.
Here is the re-written paragraph:
dummy
 dummy
dummy
To open the Resource Monitor, follow these steps:
1. Locate and launch the Resource Monitor on your computer.
2. Look for the Killer Network Service within the Resource Monitor.
The Killer Network Service can be stopped via Resource Monitor.
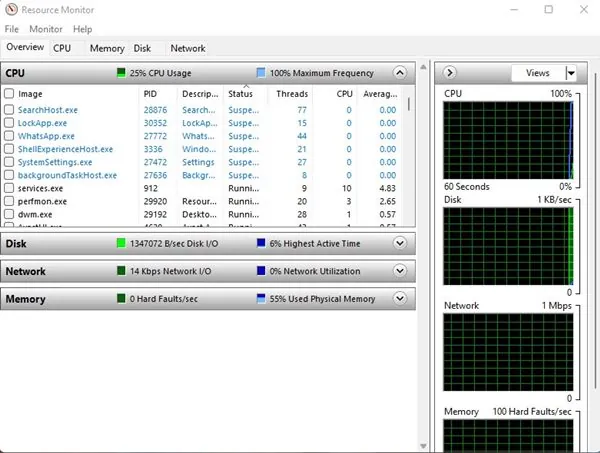
To end the process of the Killer Network Service, simply right-click on it and select ‘End Process’.
Once you have made the necessary modifications, simply close the Resource Monitor on your computer. To stop Killer Network Service on Windows, you can utilize the Resource Monitor.
5) Run the DISM Command
To restore the health of your operating system, you can use the DISM command. However, it’s important to note that this command will not stop or uninstall the Killer Network Service. If you suspect that this service has corrupted your Windows files, follow the method outlined below.
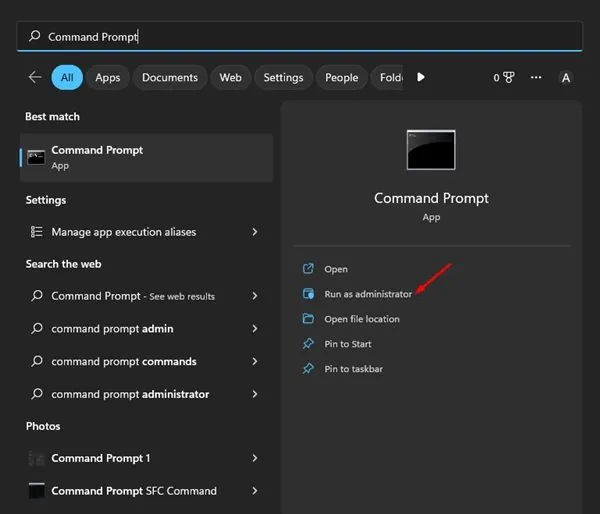
To open Command Prompt as an administrator, follow these steps:
1. Start by clicking on the Windows search bar and typing “Command Prompt.”
2. Right-click on the Command Prompt application that appears in the search results.
3. From the context menu, select the option that says “Run as administrator.”
By following these steps, you will be able to open Command Prompt with administrative privileges.
To run a command as an administrator, you can follow these steps:
1. First, locate the command prompt or PowerShell on your computer. You can do this by searching for “Command Prompt” or “PowerShell” in the start menu.
2. Once you have found the program, right-click on it and select “Run as administrator” from the context menu. This will open the command prompt or PowerShell with administrative privileges.
3. You may be prompted to enter the administrator password or provide confirmation. If so, enter the necessary information to proceed.
4. After opening the command prompt or PowerShell as an administrator, you can now run commands that require elevated privileges.
It’s important to note that running commands as an administrator gives you access to certain system-level functions and settings. Exercise caution when using administrative privileges, as making changes to system files or settings without proper knowledge can have unintended consequences.
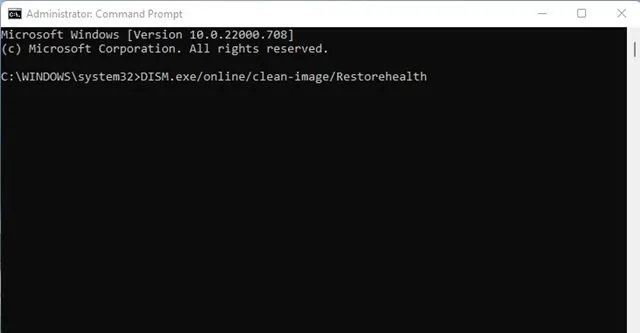
To execute the command we have shared below, simply open the Command Prompt.
To clean and restore the health of your image online, use the command DISM.exe/online/clean-image/Restorehealth.
dummy
 dummy
dummy
3. Waiting for the process to complete will effectively restore the health of your operating system.
Here’s how you can restore the health of your Windows operating system with the DISM command. If DISM doesn’t help, you can also try running the system file checker SFC command.
6) Roll back to the previous restore point
Both Windows 10 and Windows 11 offer the ability to create a restore point, allowing you to revert your operating system back to a previously functioning state.
The System Protection feature plays a crucial role in ensuring the security of your system. It effectively safeguards your files and settings, giving you peace of mind. If you ever encounter any issues, you can rely on System Protection to restore your system to a previous state. To learn more about how to create a restore point, be sure to check out our comprehensive guide.
Rolling back to a previous restore point allows you to revert your system to a previous state. This can be useful in situations where you have encountered an issue or made changes that have negatively impacted your computer’s performance or stability. By restoring to a previous restore point, you can undo those changes and return your system to a working state.
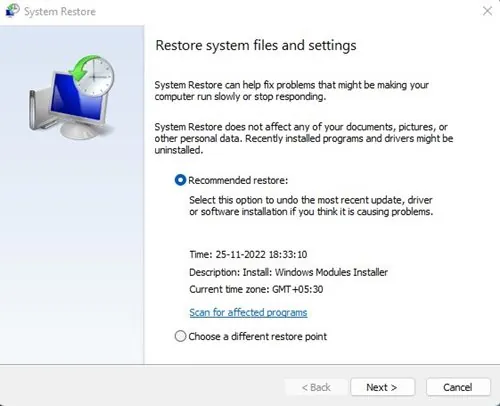
You have the option to establish an automatic restore point on your Windows 10/11 computer or laptop.
To roll back to a previous restore point, simply follow these steps:
1. Go to the Start Menu and type “Recovery”.
2. Click on the “Recovery” option that appears in the search results.
3. Follow the on-screen instructions to initiate the restoration process.
4. If you already have a restore point set up, the system will guide you through the steps to roll back to that specific point.
By following these instructions, you can easily restore your system to a previous state and resolve any issues you may be facing.
7) Update the Operating System
Updating the operating system is an essential task to ensure that your device is running smoothly and securely. By regularly updating the operating system, you can benefit from the latest features, improvements, and bug fixes provided by the developers. These updates often include important security patches that help protect your device from vulnerabilities and potential threats.
To update your operating system, you can follow these steps:
1. Check for updates: Go to the settings menu on your device and look for the “Software Update” or “System Update” option. Tap on it to check for any available updates.
2. Download and install updates: If there are any updates available, download and install them. Make sure you have a stable internet connection and enough battery life or power source to complete the update process.
3. Restart your device: After installing the updates, it is recommended to restart your device to apply the changes effectively.
It is important to note that updating the operating system may take some time, depending on the size of the update and your internet speed. It is advisable to perform the update when you have enough time and a reliable internet connection.
By keeping your operating system up to date, you can ensure that your device is running efficiently and protected against potential security risks. So, make it a habit to regularly check for updates and install them to enjoy the latest features and enhanced security on your device.

If you feel that your PC is being slowed down by the Killer Network Service, you can easily disable it to maximize performance. It is important to have an up-to-date operating system to ensure optimal functionality.
If you suspect that your system’s slowdown is caused by a bug, updating the operating system can help. To update Windows, go to Settings, then Windows Update, and click on Check for Update.
This guide focuses on Killer Network Service and whether or not you should disable it. We aim to address all your queries regarding Killer Network Service. If you require further assistance in disabling Killer Network Service on Windows, feel free to leave a comment below.